Create your own
Year growing plan
If you’re like me and you like order, everything in one place and an easy way to remember what you’re supposed to be doing… a year planner may help you as much as it helped me. Below, I’ll describe how I created my year planner and how it has helped organise my year.
This is a good winter task when there are fewer jobs to do. So, grab the items below, make a cup of tea and organise the coming year.

I found the inspiration to create this planner by reading Huw Richards’ book “Veg in One Bed” (read more here) and his year planner gave me a great starting place.
Things you will need:
You can do this as simply or as thoroughly as you wish and I would always recommend using things from around the house if possible, rather than spending money.
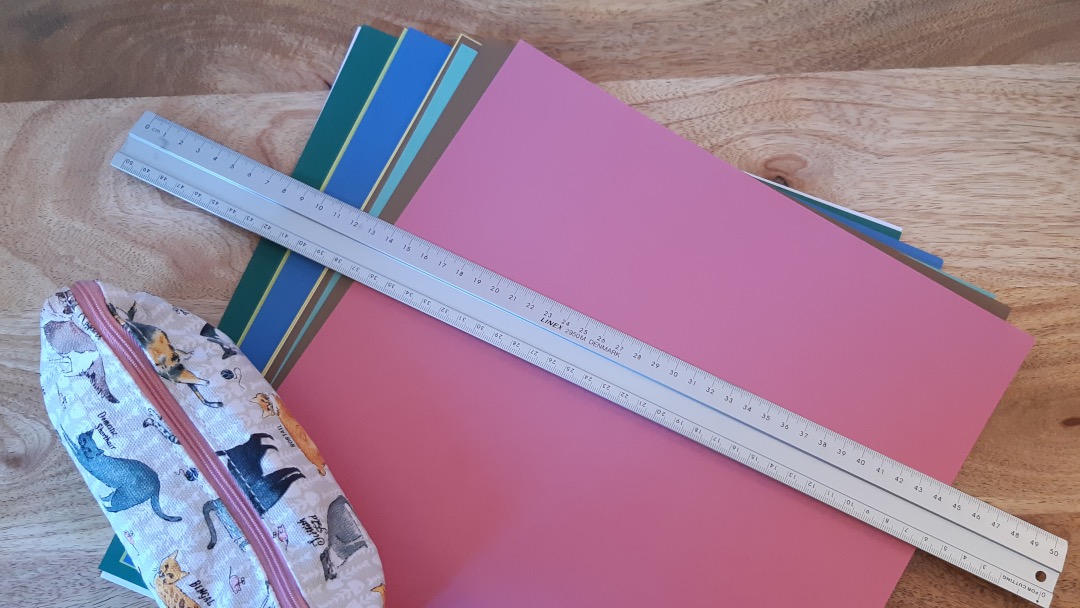
- Card or large sheet of paper: My partner is very crafty (as in, arts and crafts… not sneaky) and so we had a big stack of coloured card. That was perfect for this job though the inside of a cereal box or thick sheet of paper will also work.
- Ruler: You could freehand this but wonky lines makes my eye twitch. Something which is at least as wide as your card/paper.
- Coloured pencils: To separate the different stages of growth. Makes it easier to scan the planner.
- A bit of time: This took me a couple of hours but then I’m little obsessive about these kind of things.

“Ok, lets get into it”.
Step 1: Work out how many plots you need
I did this by grabbing a piece of wood (bamboo cane) that was roughly a meter long and seeing how many meter long plots I could fit in my raised beds combined. It worked out to 11, roughly. So I decided on ten plots and having a spare for something random each season, just to spice things up a little.
Ten is also a nice round number to work with.
Step 2: Fruit & veg list
Next, choose which vegetables and fruits you would like to grow in that space. You will want to choose more than the amount of plots you have, but not so many more that you run out of space. Order these in priority order so that, if we aren’t able to fit in the bottom ones, it’s not going to ruin your year.
Using magazines, internet searches, your books or the back of seed packets, work out which items will overlap to get the most out of your plot. A great example is potatoes and leeks:
Potatoes (depending on variety) are in the ground between March and June/July, leeks are planted out in July/August and are harvested up to February.
Keep in mind overwintering vegetables too, ones which will happily stay in the ground and be harvested over the winter or early spring. Another great example is kale and Swiss chard:
Planting out Swiss chard in September will provide you tasty leaves to March (when they start to get a bit bitter by the end of the month) and in April you can sow out your kale which is harvested between July and August.
Step 3: Create a table
The next step is to break your sheet into a table with the amount of rows equal to the plot number. In my case, it’s ten plots. So my table would look something like this:
| Jan | Feb | Mar | Apr | May | Jun | Jul | Aug | Sep | Oct | Nov | Dec | |
|---|---|---|---|---|---|---|---|---|---|---|---|---|
| Plot 1: | ||||||||||||
| Plot 2: | ||||||||||||
| Plot 3: | ||||||||||||
| Plot 4: | ||||||||||||
| Plot 5: | ||||||||||||
| Plot 6: | ||||||||||||
| Plot 7: | ||||||||||||
| Plot 8: | ||||||||||||
| Plot 9: | ||||||||||||
| Plot 10: |
Make sure you leave some space under the Plot number in the first column so we can fill it in with the vegetable/fruit name in the next step.
Step 4: Choose your colours
There are 4 main pieces of information you need on this planner, for each plot, choose a colour. I chose:
- Orange: When the seeds are sown (for direct sowing)
- Green: When the seedlings are transplanted (for those started on the windowsill or cold frame)
- Red: When it’s harvested
- Blue: When it’s growing on
Step 5: Start colouring in
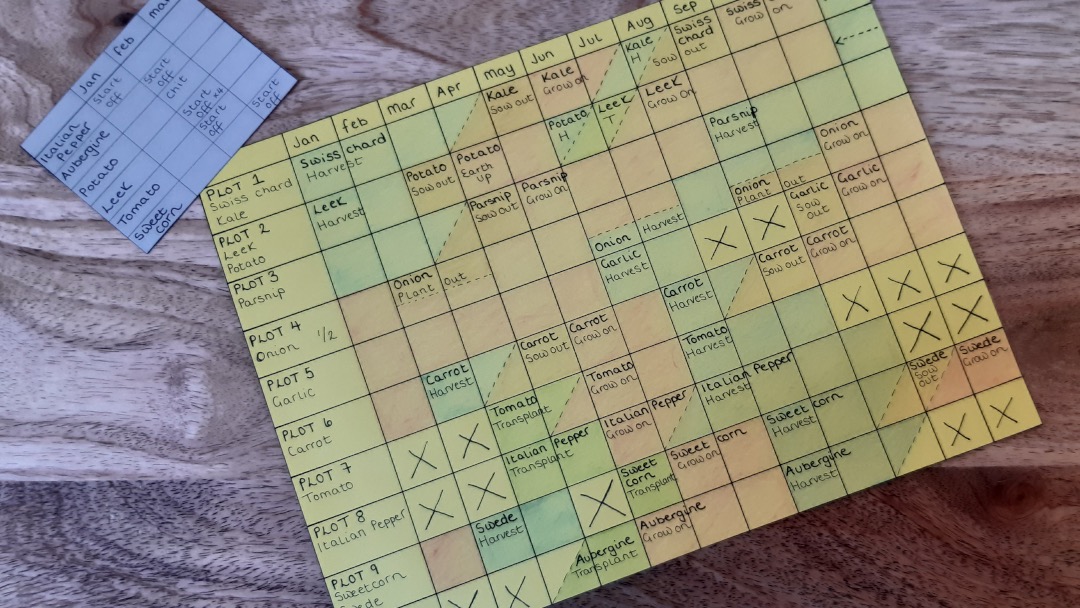
Again, using your research on each of the vegetables and fruits you have chosen, and which should share a plot, start filling in the blocks depending on when you should be taking that action. If an action should take place at the end of the month, use a diagonal line to indicate this.
Using the above example of leeks and potatoes, this was my year filled in. You can also add notes into the blocks if it helps you:

Step 6 (Optional): Make a windowsill chart
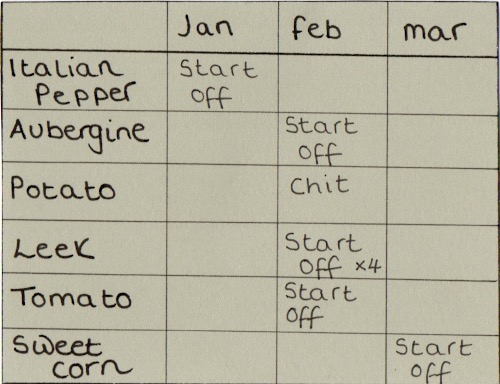
As we already have all the bits needed, it may also be worth creating a small windowsill/cold frame table. This simply lets you know which months you need to be getting the seedlings going indoors, for those that need to be transplanted later (those in Green):

Step 7: Put it on the fridge, or in your potting shed
Tweak and improve your planner over the years. If there is anything in the wrong block or needs to shuffle along, make a note of it and perhaps do a new chart once you have enough additions.
I hope you found this guide useful and it gives you the inspiration to plan out your year. If there is anything that can be improved, you have any ideas of your own to share or anything missing, please let me know in the comments below so I can update this guide.
The full plan can be found here: Open full plan
Article written on Apr 20, 2020
Updated Apr 20, 2020