Squash
Roasted, baked or mashed... either way it's yum
Squash makes a gorgeously sweet soup or my favorite: squash and sweet potato tortillas. It’s a great vegetable for harvesting nearer the end of the year and is quite straight forward to grow.
This is a week by week diary of the growing, maintenance and harvesting of squash.
Quick tips
- Sow 1-2 seeds into each module of a seedling tray
- Prefers full sun
- The plants take a little more space than most (transplanted around 60cm apart)
- Seeds can be sown in March
- Mulch well to protect fruit from soil & pests
- Wildlife loves eating the seeds, so keep protected
- Pick often to encourage cropping
Dates
To grow squash through the summer,use the following dates:
| Jan | Feb | Mar | Apr | May | Jun | Jul | Aug | Sep | Oct | Nov | Dec | |
|---|---|---|---|---|---|---|---|---|---|---|---|---|
| Sow indoors | I | I | I1 | |||||||||
| Transplant | T2 | T | ||||||||||
| Direct outdoors | O | |||||||||||
| Harvest | H | H | H | H |
Type of squash
I grew the “Winter, Early Butternut” Squash this year and can be found here from Thompson & Morgan or here from Mr.Fothergills

Watch it
I’ve compiled the growing diary for squash into a short video for you:
Growing diary
I started this diary, and sowed these seeds, on the first week of May (19th week of the year).
Week 1: Sowing
Sowing squash seeds is similar to many other large seed vegetables. Start by filling your chosen seed tray (I used the 84 cell tray as I started other veg at the same time) with a seed, or general, compost. You don’t need to press too firmly, the seedlings will have an easier time pushing down their roots if it’s a little fluffy. Make sure each module is full and there aren’t any air pockets.

Water thoroughly or sit the tray in water to allow the compost to soak up as much water as possible. This’ll ensure the seedlings have a good starting drink to get them going and will mean the compost wont dry out too quickly.

The seeds are quite large so I would recommend sowing just one seed per cell.

Sprinkle a little compost over the seeds, patting down gently and making sure the seeds are covered. Lastly, give them a splash of water.

Put your label in place so you remember what you have planted.
Tip: Instead of writing a label for each column of your seed tray, write two and put them in the outermost columns that you used. If you always do this, you know that everything between the labels is the same.
If you’re getting your seedlings going indoors, put this on a sunny windowsill. If, like me, you’re growing in a grow tent (which I would recommend) then this tray can go near the bottom as the seedlings don’t need light yet.

Week 2 → 3: Nothing yet
Squash seeds take between 7-14 days to germinate and need around 15-20°C, which is a little warmer than the average for this time of the year.

Don’t be surprised they have not woken up yet.
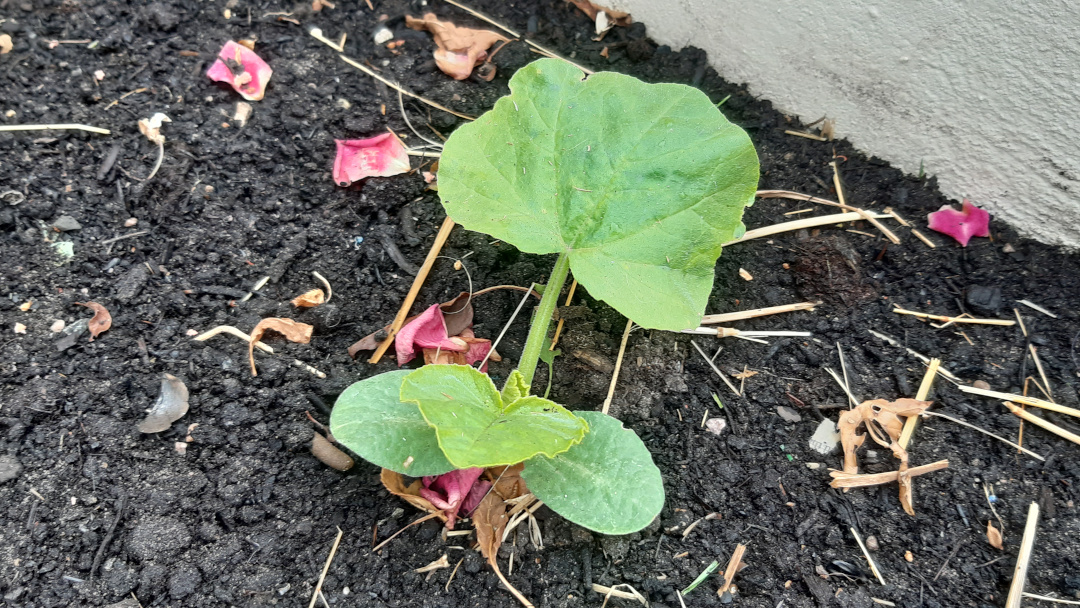
Week 4: Healthy seedlings
What a difference a week can make. You could’ve almost seem them growing in front of your eyes. The leaves and stem are thick and these will soon outgrow their cell, so best plant them where you want them to grow.

First, choose where you want to grow your squash. I’ve got a bed on the sunny side of my garden which was be perfect. They would also grow well in a large pot. Make sure you space them apart a bit as they are larger plants (25cm -> 50cm).

Note: You don't need to plant all of the seedlings you have grown, pick the strongest ones and pop the others in the compost bin
Make the holes
Using a dibber (make your own if you don’t have one, it makes transplanting much easier), make a two inch deep hole for your squash seedlings. If you find you aren’t making a very neat hole, try watering the soil first so it holds together.

Ease pods from cell
Using the flat end of a pencil, poke out the pod from the cell using the hole in the bottom. If this is a little tricky, water the soil first so it holds together.

Transplant
Place each pod into each hole and press down so the top of the cell is flush with the top of the soil. Place your fingers either side of the stem and gently push down.

Water
Lastly, give them a good water. Transplanted seedlings get shocked by being moved and their roots disturbed. We limit this by using a similar soil in both the tray and the pot and by watering the roots in well after moving them.

Week 5: A true leaf
Each of the squash seedlings should now have developed a true leaf. As squash has thick leaves, they are more able to cope with very sunny days, and are protected from sun scorch. Which is great for these seedlings as we head into summer.

If you have slug and snail problems in your garden, I would recommend putting down some slug traps like I did.
Week 6 → 12: Growing happily
Over the next few week, the squash plants will grow on well and will steadily produce new leaves.
Keep the plants well watered during hot periods to stop the leaves wilting.
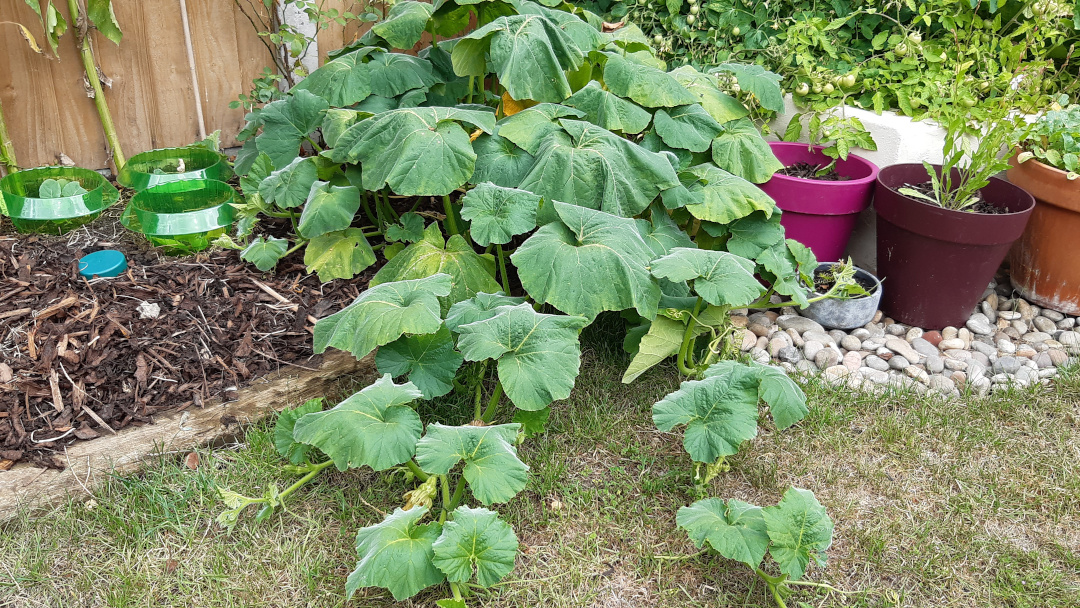
I would also recommend mulching around the plants with wood chip or hayto keep the soil from drying out too quickly.
You should also find that the stronger the plants get, the less the pests seem to bother them. It’s sometimes worth waiting a week or two before transplanting them so they are better able to withstand pests.
Week 13 → 14: Fruit! Well that’s exciting
Hurray! You should now be blessed with a healthy looking fruits, growing well on each of your plants.
If you haven’t started using a liquid feed yet, now is a good time to start. Like an expectant mother, the plant needs more energy and nutrients as they develop their fruits. The better we look after the plant, the better quality fruit we will get as a result.
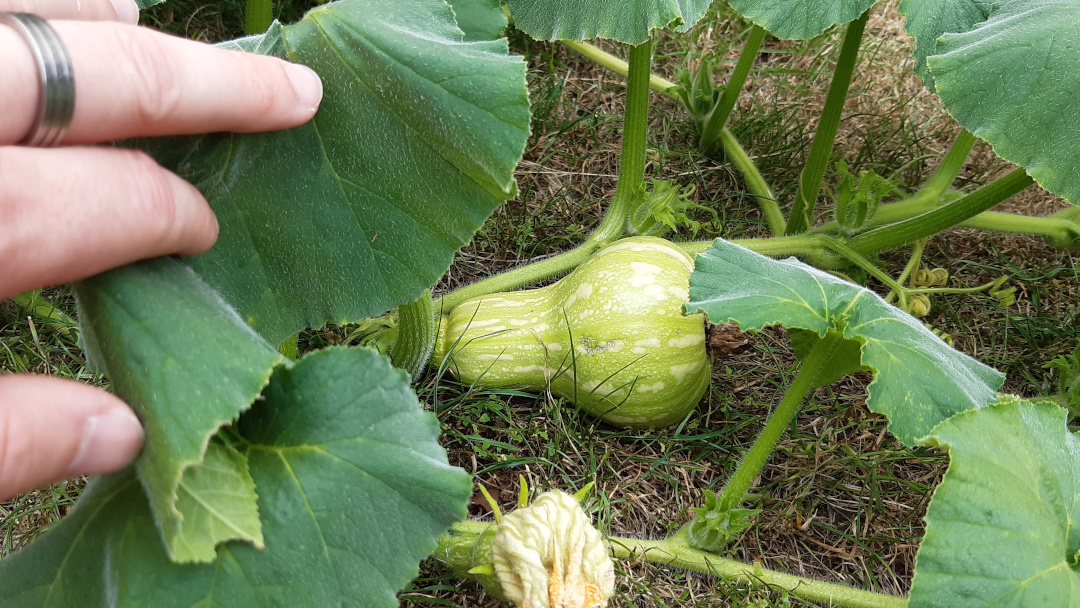

We’ll look at cutting the trails in the next few weeks to limit the amount of fruit we are growing.
Week 15 → 17: Major fruit splitage!
When you have a period of very hot and dry weather, followed by a week of rain, many fruits (e.g. tomato, squash, cucumber, pumpkin) can split. This is caused by the skin hardening a little during the hot weather and then swelling quickly with the rush of water.
Depending on the severity of the split, the fruit can sometimes be left on the plant but more often should be harvested to stop it rotting or attracting pests.
The risk of splitting can be reduced by:
- Regular waterings
- Mulching the surface to reduce moisture loss
Hopefully though, you’ll have a couple of healthy fruits developing per plant and it’s not the end of the world if we lose a few.

Over the next few weeks, the plants will continue to produce more flowers. You may also see fresh greenery on your plants. This can be caused by lots of rainfall or damaged fruits, either way, it means more fruit for you.
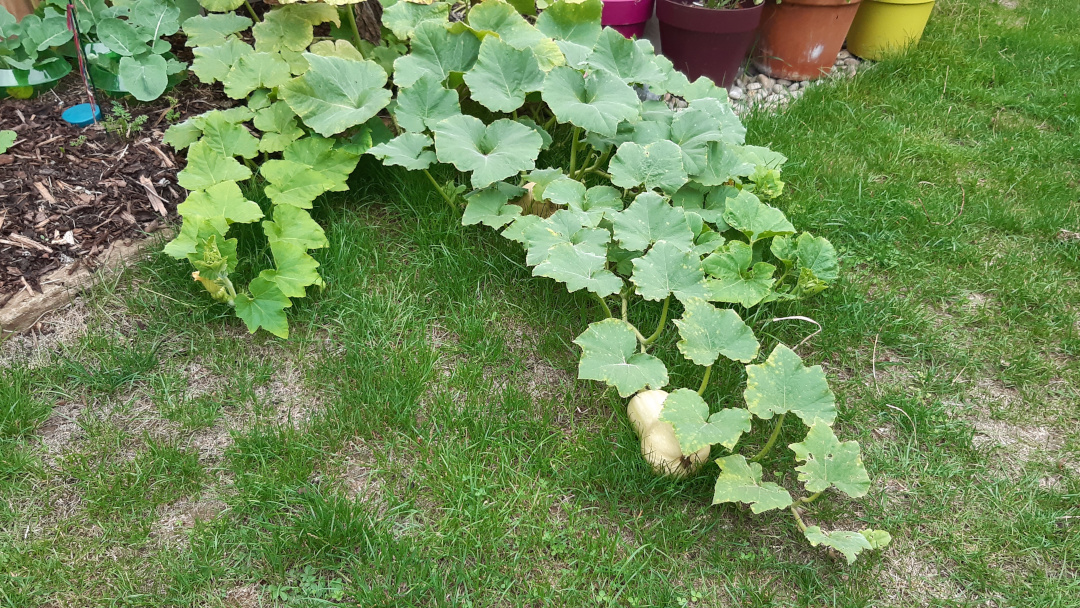
Week 18: Growing on
Your squash should be trailing nicely and it’s more than happy to be manhandled into a better growing position:

I moved the trails off the lawn and into the raised bed so they don’t get damaged as I walk past.
Harvesting
The squash is ready when it starts to develop a slightly peachy/creamy colour, like this:

To harvest, simply cut the squash off the vine, leaving as much connected to the fruit as possible:

This can be left outside, on some newspaper or straw to ripen a little more if necessary, but take care to only do so during periods of sunny weather.
Phew, 19 weeks. I harvested two strong squashes this year and I can’t wait to use them in yummy meals and soups.
Do you think you would grow squash again? Please add your experience and tips below so we can all learn and grow together.
Article written on May 12, 2020
Updated Sep 25, 2020