Garlic
Free and delicious, what's not to love?
I bought a bulb or two from the supermarket a few years ago and have been replanting the same garlic since. It’s great fun to grow and only takes up a small amount of space, or a large pot.

This is a week by week diary of the growing, maintenance and harvesting garlic.
Quick tips
- Keep a few bulbs aside after your harvest to sow again
- Can be planted surprisingly close together
- The longer you leave it to dry, the longer it’ll store
- Long growing time
- Choose a type of variety you like to eat and buy from the supermarket, rather than buying specific growing garlic
Dates
To grow garlic through the winter and spring,use the following dates:
| Jan | Feb | Mar | Apr | May | Jun | Jul | Aug | Sep | Oct | Nov | Dec | |
|---|---|---|---|---|---|---|---|---|---|---|---|---|
| Sow | O | O | O | |||||||||
| Harvest | H | H | H |
How much garlic?
If you are growing for fun, grow as many as you want to, or as much as you have space for.
If instead you are relying on your grown stock: Do a quick estimate of how much garlic you use each week and this should give you a rough idea of how many cloves you need to plant. If properly dried, garlic can last well over half a year in the cupboard (my best is around 8 months)
E.g: We use 2-3 cloves a week. If I’m looking to grow enough for 8 months, I’ll need around 280 cloves. A normal bulb contains 8-11 cloves so I would be looking to grow between 26 and 36 bulbs of garlic… which you will get from 3-4 bought garlic bulbs. Cool huh?
Growing diary
I started this diary towards the end of October (43rd week of the year).
Week 1: Sowing
The first step is to break apart your bulbs of garlic into their cloves. Use your fingers rather than a knife as we don’t want to damage the cloves. This could cause them to rot in the ground.

The next step is to make holes for each of your cloves. Garlic can be planted quite close together and leaving empty space between is a waste. The space between each hole should be just a little larger than a large bulb of garlic. This will make your growing space efficient.
Using a dibber or a tool handle, make a hole around 2 times the depth of the clove.

Drop a single clove into each hole, making sure to have the pointy end pointing upwards and the flat/rough end downwards.

Lastly, cover the cloves with a little soil and give it a good water. This will wash the soil in around the clove, which will encourage it to germinate.
Week 2: Nothing yet
Garlic can take a few weeks to start poking up through the soil/mulch, so I wasn’t expecting to see anything yet.

There is nothing to do at this stage.
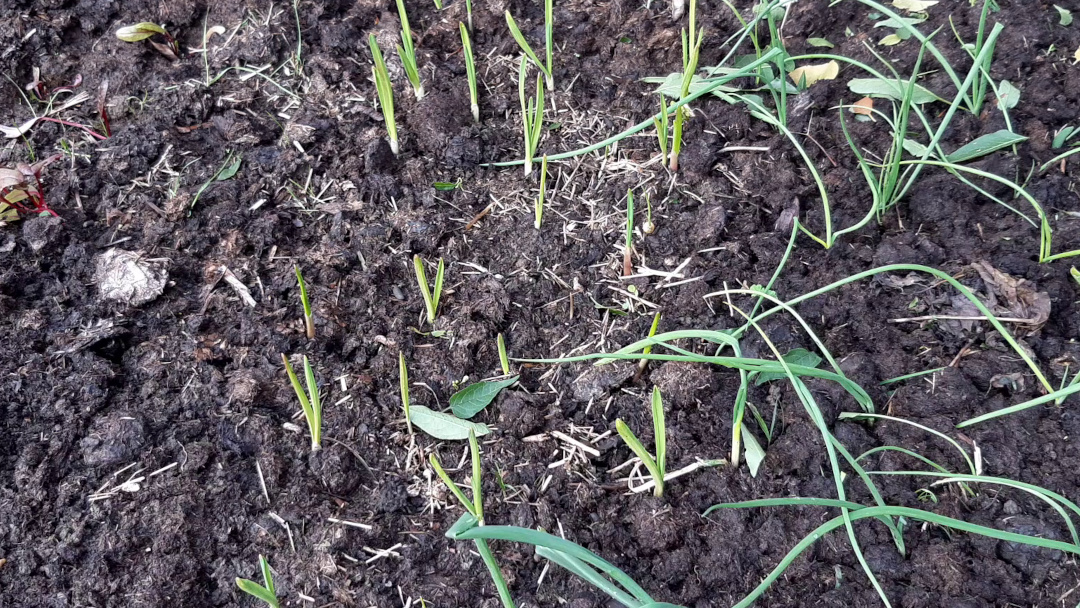
Week 3: Germination
At the start of week 3, we can see the garlic already starting to germinate and grow up through the manure. This is a good sign that the cloves were healthy.

As we got these in and growing before the frosts hit, I’m confident that these will survive the winter just fine.
Week 4 → 14: Growing on well
Over the next few weeks, the garlic should be growing on well.
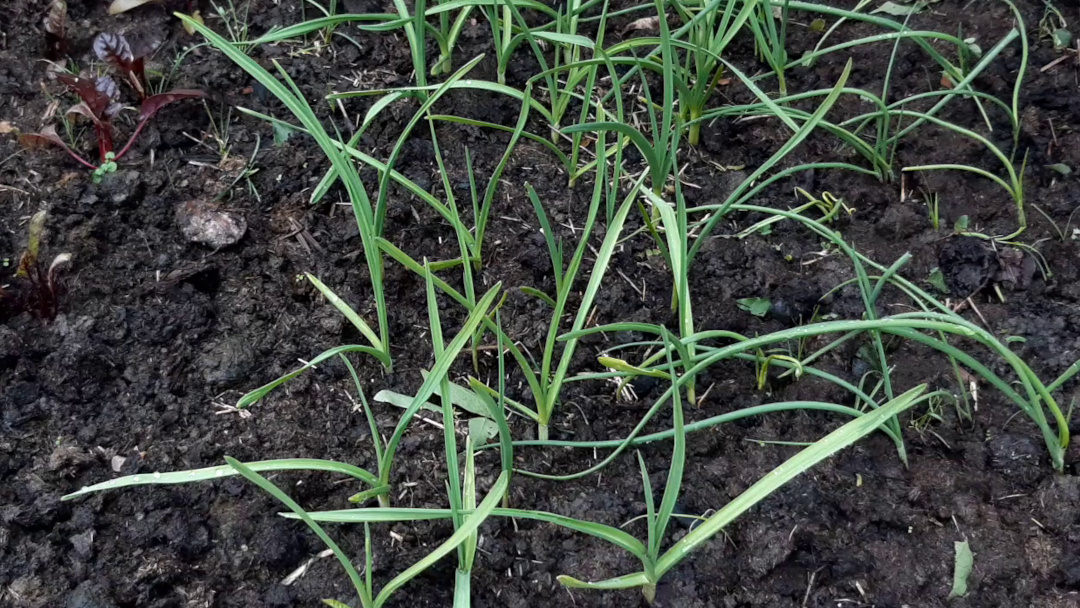
It’s the perfect vegetable to grow at this time of the year because it requires little to no maintenance. So you can stay in the warm with a cup of tea instead of having to go out into the cold.
It wouldn’t be a terrible idea to get another load in the ground at this stage too, this will give you harvests around 8 weeks apart and covers you if either is damaged.
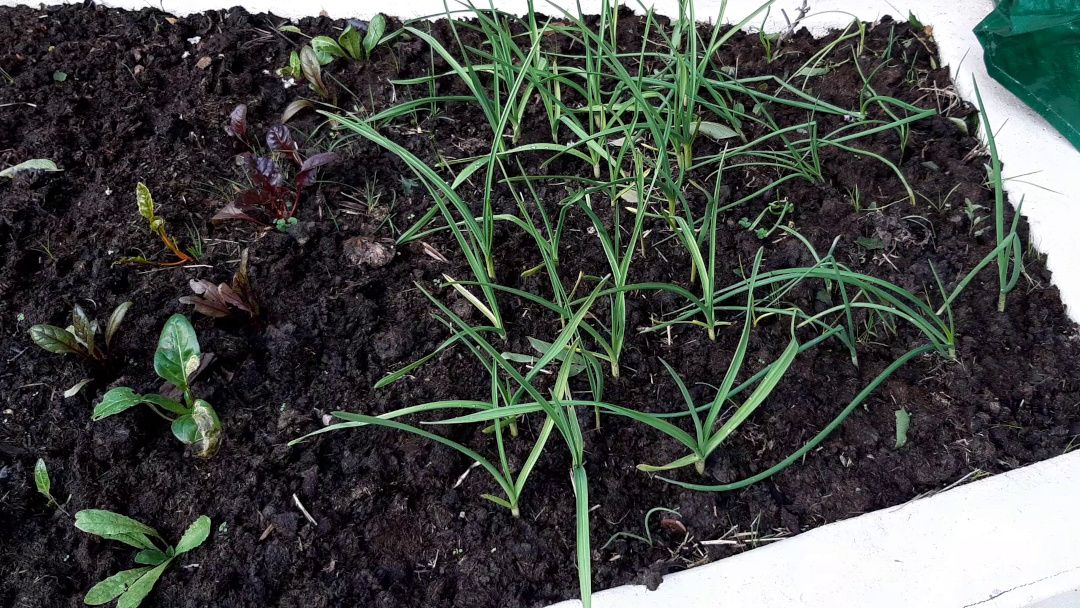
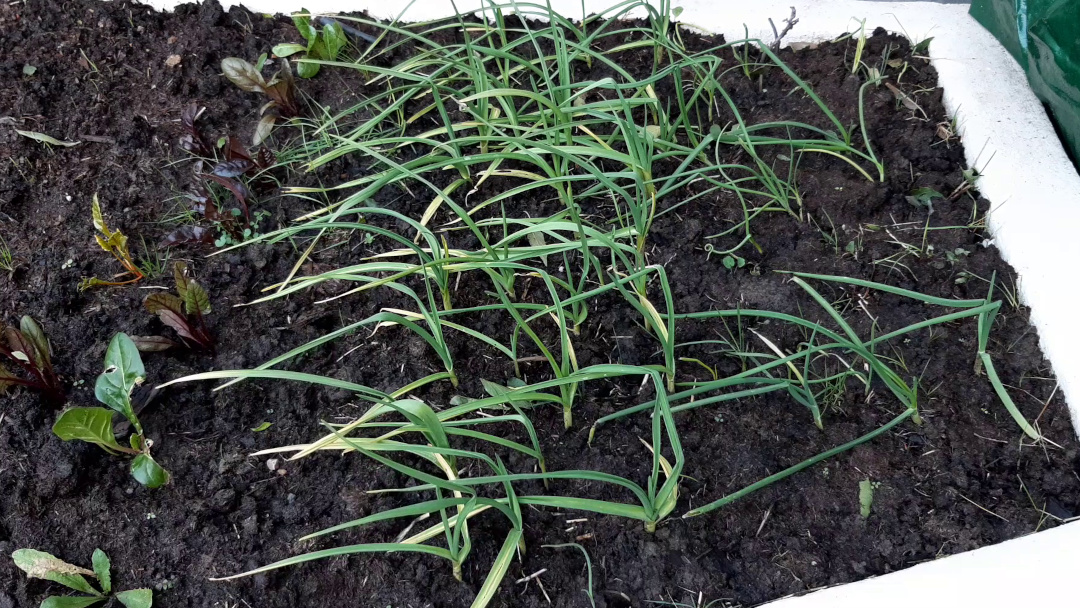
If any cheeky weeds start creeping around the garlic stems, gently remove them. Otherwise, all we need to do it be patient.
Week 15: Coming next week
I’ll update this page with the garlic’s progress. If you have any questions or tips, please put them in the comments so we can all benefit from your experience.
Article written on Oct 22, 2020
Updated Jan 27, 2021