Kale
Curly curly kale
Kale is another one of those amazing greens to grow, it overwinters well and fills the gaps over the colder seasons. I team it up with Swiss Chard so I have tasty leaves most of the year round.
This is a week by week diary of the growing, maintenance and harvesting of kale.
Quick tips
- Sow 3-4 seeds into each module of a seedling tray
- Space around 30cm apart
- Very hardy and overwinters well
- Provides great harvest through all of winter
- Can tolerate part shade due to it’s long growing period
- Seeds can be sown from late March → May under cover or direct
Dates
To get kale harvests through the winter,use the following dates:
| Jan | Feb | Mar | Apr | May | Jun | Jul | Aug | Sep | Oct | Nov | Dec | |
|---|---|---|---|---|---|---|---|---|---|---|---|---|
| Sow indoors | I | I | I | |||||||||
| Direct outdoors | O2 | O | O | |||||||||
| Transplant | T | T | ||||||||||
| Harvest | H | H | H1 | H | H | H | H |
Pests
Kale are susceptible to the following pests:


Type of kale
We are growing the “Dwarf Green Curled” kale which we received with our copy of Grow Your Own (I would defiantly recommend this magazine for the free seeds alone). You can find them here from Mr.Fothergills or here from Thompson & Morgan.

Watch it
I’ve compiled the growing diary for pumpkins into a short video for you:
Growing diary
I started this diary, and sowed these seeds, on the first week of May (19th week of the year).
Week 1: Sowing
Sowing kale seeds is similar to many other leafy greens. First start by filling your chosen seed tray (I used the 84 cell tray as I started other veg at the same time) with a seed, or general, compost. You don’t need to press too firmly, the seedlings have an easier time pushing down their roots if it’s a little fluffy. Make sure each module is full and there aren’t any large air pockets.

Next, water thoroughly or sit the tray in water to allow the compost to soak up as much water as possible. This’ll ensure the seedlings have a good starting drink to get them going and will mean the compost wont dry out too quickly.

As you get so many seeds in each packet, for best results with germination, I would recommend sowing 3-4 seeds per cell. We’ll thin out the weakest seedlings later.

Sprinkle a little compost over the seeds, patting down gently and making sure the seeds are covered. Lastly, give them a splash of water.

Put your label in place so you remember what you have planted.
Tip: Instead of writing a label for each column of your seed tray, write two and put them in the outermost columns that you used. If you always do this, you know that everything between the labels is the same.
If you’re getting your seedlings going indoors, put this on a sunny windowsill. If, like me, you’re growing in a grow tent (which I would recommend) then this tray can go near the bottom as the seedlings don’t need light yet.

Week 2: Starting to germinate
Kale usually takes between 2-3 weeks to germinate but don’t be too suprised if after only a week, the seedlings are already standing proud. Hopefully you have a good germination rate. If not, check the date on your seed packet or it may be the tray is not in a warm enough position.

During the week, the seedlings may start to lean towards the light. To counter this, move them up a level in the grow tent so they get more light and turn the tray around every few days. This should encourage them to correct themselves.

Week 3: Growing taller each day
Each day the seedlings are growing and they should be looking pretty healthy. As they grow, make sure they are well watered as they would quickly die from the soil drying out.

Keep turning the seed tray every few days to make sure the seedlings grow upwards rather than to the side.
Week 4: Leggy seedlings
My seedlings are much more leggy than usual, and this was caused by me forgetting to open the door to the grow tent during the hottest parts of the day.
It’s fine though and it’s fixable. Let’s thin them out.

Thin the seedlings
Thinning is pretty straightforward and not something to get nervous about, it’s actually pretty therapeutic. If you’re new to thinning, do the following:
Remember how many you need: First, check the seed packet or do your research to find out how many seedlings you want in each cell. If you’re multi-sowing then its usually around 3-4, if for a single plant (e.g. something big) then you only want one healthy seedling.
Check each cell: Take a look at each cell. We’ve sown more seeds than we need so it’s OK if half of them aren’t planted out or aren’t very strong. Look for the strong cells and focus on these first.
Choose the best, snip the rest: One cell at a time, snip or pinch off the seedlings that are looking the weakest leaving the one(s) which will be the strongest. The strongest is not always the biggest. Leggy seedlings (a long thin stem which is bendy) should be removed and keep the ones with the most leaves or the thickest stem.
You don't have to thin all in one go. If there are a couple of good contenders in a cell, leave both and thin again in a weeks time.

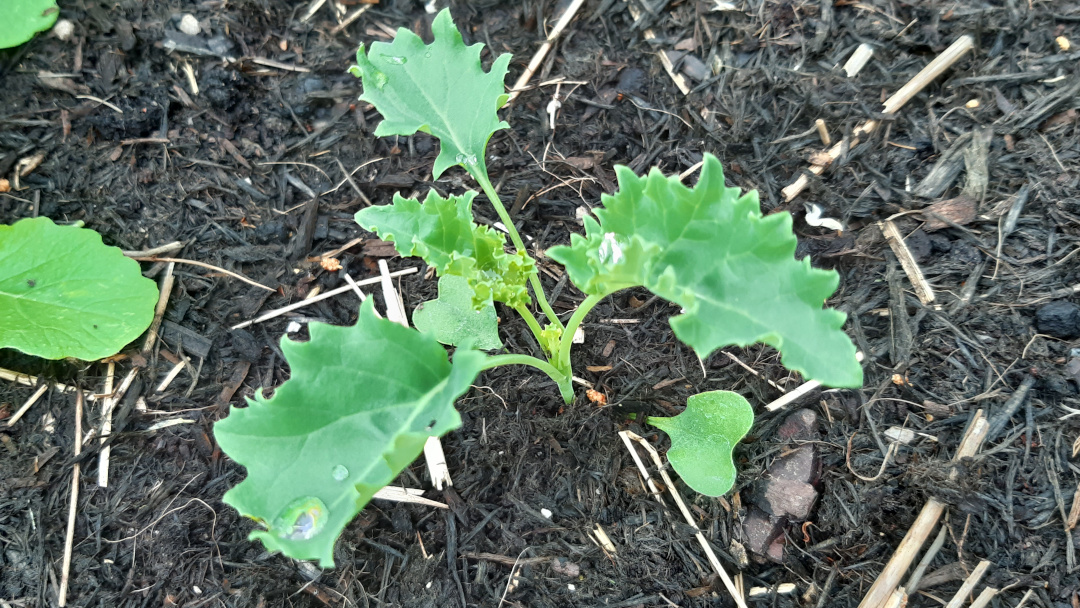
Week 5: Transplant time
Leggy and weak seedlings can strengthen up with a little care and attention and thinning the kale will certainly have given the seedlings more room to breathe and they should be thickening up nicely.

They would now be ready to go in the ground.
The first step is to choose where you want to grow your kale. If you have many slugs or snails in your plot, I would recommend splitting your plants across two parts of your plot.
This variety of kale can be transplanted 45cm apart, according to the packet, though we know they can often be planted much closer together.
In the interest of saving space, I grew planted these around 30cm’s apart.
Note: You don't need to transplant all of the seedlings you have grown, pick the strongest ones and pop the others in the compost bin
*Water the ground (optional)
If the ground is quite dry, best give it a water. Not only will it shock the seedlings less, it’ll make making the holes much easier.

Make the holes
Using a dibber (make your own if you don’t have one, it makes transplanting much easier), make a deep hole for your kale seedlings. Usually the hole would match the depth of the cell but as these plants are a little stretched, we can transplant them deeper for extra support.

Ease pods from cell
Using the flat end of a pencil, poke out the pod from the cell using the hole in the bottom. If this is a little tricky, water the tray first so the soil holds together.

Transplant
Place each pod into the bottom of each hole and gently bring the soil up to surround and support the stem.

Water
Lastly, give them a really good water. Transplanted seedlings can get shocked by being moved and having their roots disturbed. We limit this by using a similar soil in both the tray and the pot and by watering the roots in well after moving them.

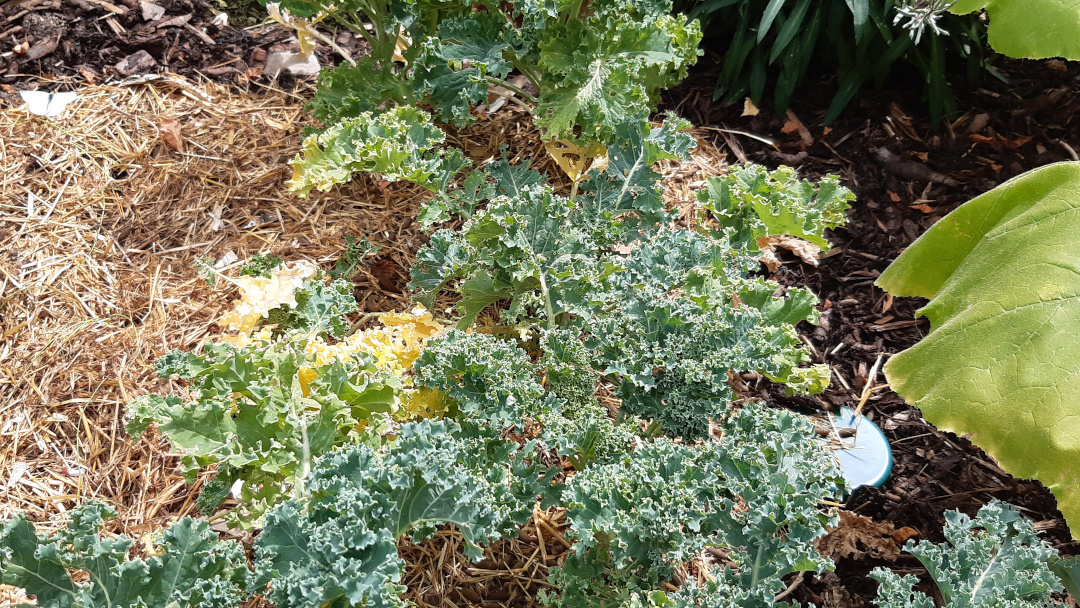
Week 6 → 13: Growing nicely
After transplanting, the seedlings can look a little limp and lifeless. This is due to the shock of being transplanted and, with a little water and sun they’ll soon strengthened up.
During these growing months:
- Keep an eye out for pests, especially Aphids
- Keep them well watered and weed free
- Resist the urge to start cropping too early: The longer you wait, the longer the harvest period will be
- Remove any yellowing leaves, or those sitting on the surface of the soil, and throw them in the compost bin. It’s normal, as the plant grows, to shed older leaves and replace them with new stronger ones
Week 14 → 16: Look out for cabbage white butterfly
Kale are very susceptible to cabbage white caterpillars, so be on the lookout for the distinctive white butterfly hanging around your kale.
Check underneath your kale leaves and look for clumps of eggs, like so:

To remove them, either:
- Squash the eggs under your thumb, being careful not to damage the leaf
- Mix up a garlic spray to ward off the butterfly
- Get yourself a pest control spray which targets cabbage white butterfly specifically
Week 17 → 20: Growing on
Your kale should be growing on well. Keep an eye out for eggs on the leaves and continue to give it a liquid feed once a week until you are ready to harvest. Remove any damaged or dead leaves to keep the plant fresh.
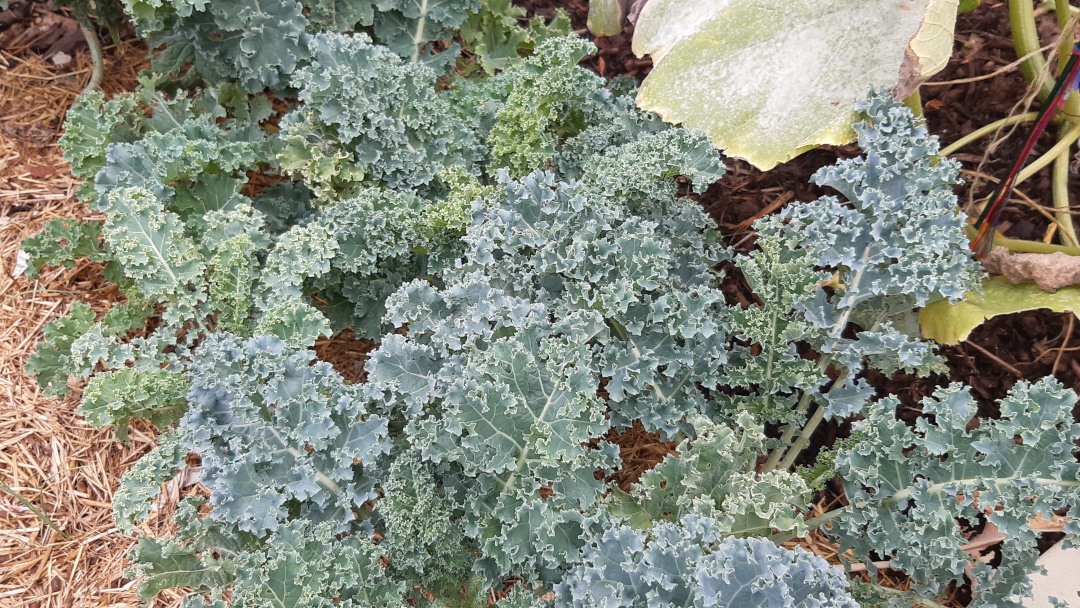
As the leaves start to overlap and the greenery becomes more compact, you’ll need to be extra vigilant about looking for pests and eggs. The darkness, the damp, and the safety from predators will make your crops all the more attractive. The overlapping leaves also makes it easier for pests, such as slugs and snails, to travel between your plants, where they couldn’t before.
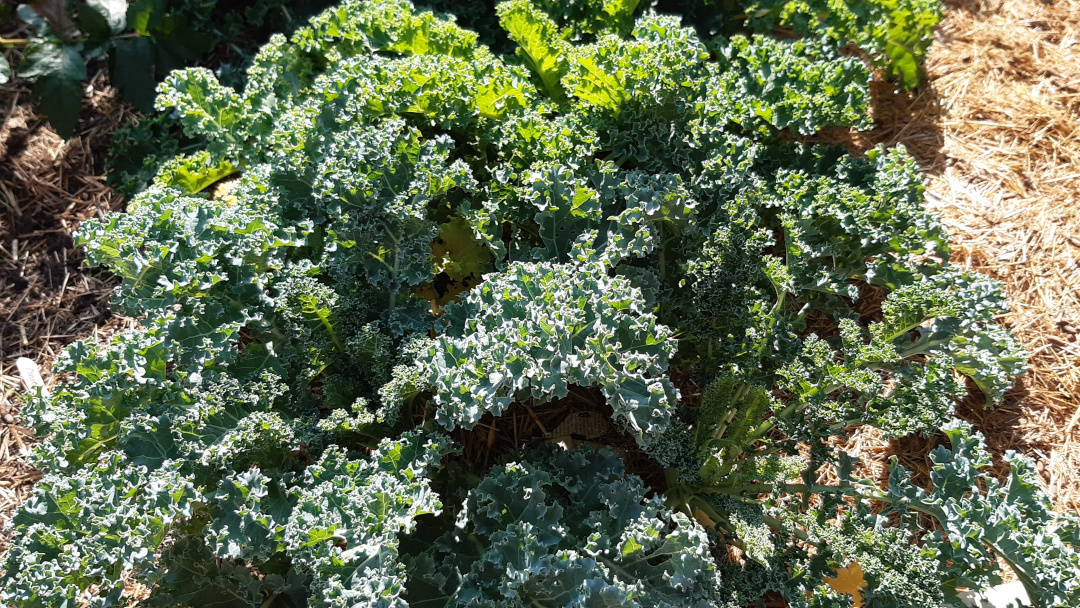
Harvesting
After around 20 weeks, depending on the weather you’ve had and how well your seedlings rooted, they should be about ready. The leaves should be crisp and curled.
To harvest, get a sharp pair of scissors and cut off the lowest leaves from the base of the stem.

We take the lowest leaves for a few reasons:
- We don’t need to take as many for our meal as the lowest are the largest, leaving more for the plant to continue growing
- The largest will attract more pests
- The largest have the best flavour
Try to harvest equally across all of your plants.

The plant will start to look odd over the next few months of harvesting. It’ll be tall with just a mop of leaves on the top. This is absolutely fine, just keep harvesting the leaves. When the plant is done, cut the whole plant at the soil level. Don’t pull the plant out as it’ll disturb the soil and the roots will just break down, adding back to the nutrients of the soil.
Have you grown kale before? If you have any tips, please pop them in the comments below for others, so we can all learn and grow together.
Article written on Apr 22, 2020
Updated Sep 28, 2020